"This one is the simplest tutorial on How To Install OpenCV"
Know how to earn through Cloud computing without investing anything, without doing any work.
1. OpenCVmod_32bitKnow how to earn through Cloud computing without investing anything, without doing any work.
Shopping FREE of Cost :) (Without doing any work)
Requirements-
2. Visual Studio 2010 / 2012
3. Windows 7 / 8
(Thanks to Hongbo Miao for this tutorial to install OpenCV 2.4.4 for Visual Studio 2012.)
Follow the steps carefully. Don't miss a single step and you are ON.
Step-1
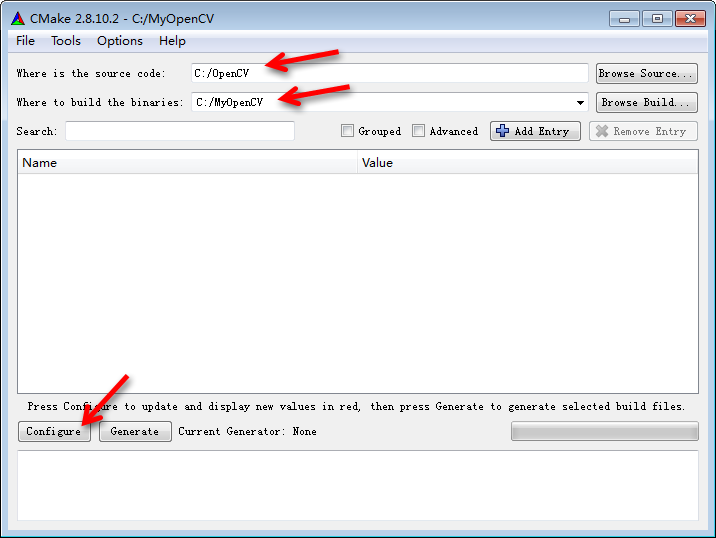
Extract the zip file and store it in "C" drive. Now it should look like "C:/OpenCV/install/
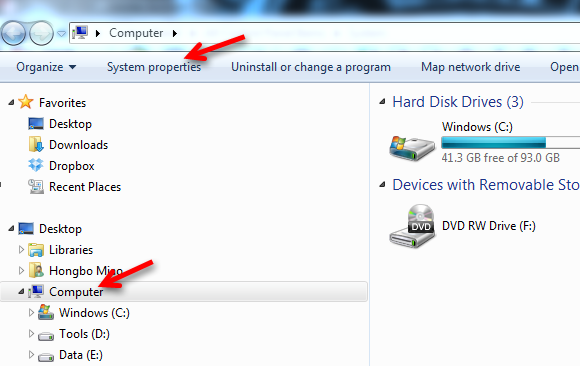
Open Windows Explorer. Click on Computer and then System properties.
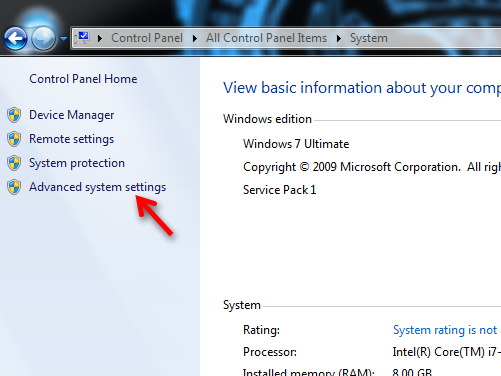
Choose Advanced system settings.
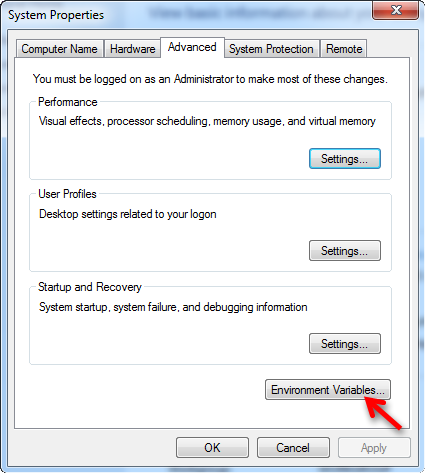
Click Environment Variables...
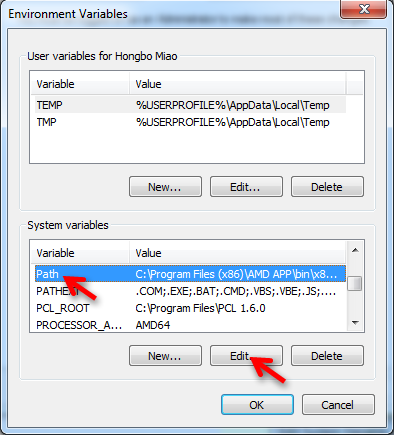
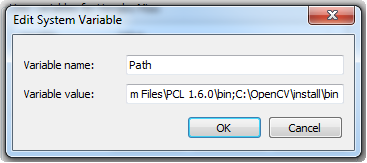
Add only this to Environment Variables -> System variables -> Path
C:\OpenCV\install\bin
Step-2
Create a new project without any source file.
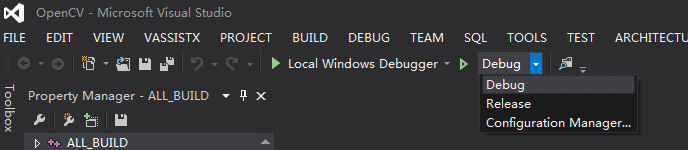
For Debug:
View -> Property Manager
- C/C++ -> General -> Additional Include Directories
C:\OpenCV\install\include\opencvC:\OpenCV\install\include
- Linker -> General -> Additional Library Directories
C:\OpenCV\install\lib
- Linker -> Input -> Additional Dependencies
opencv_calib3d245d.libopencv_contrib245d.libopencv_core245d.libopencv_features2d245d.libopencv_flann245d.libopencv_gpu245d.libopencv_highgui245d.libopencv_imgproc245d.libopencv_legacy245d.libopencv_ml245d.libopencv_nonfree245d.libopencv_objdetect245d.libopencv_photo245d.libopencv_stitching245d.libopencv_ts245d.libopencv_video245d.libopencv_videostab245d.lib
Note the file names has extra "d" which means debug
and its over...
Now restart the system and run the below code for testing.
Sample code:
//Reading an image
#include "opencv2\core\core.hpp"
#include "opencv2\highgui\highgui.hpp"
#include "cv.h"
#include "highgui.h"
#include "opencv2\highgui\highgui.hpp"
#include "cv.h"
#include "highgui.h"
using namespace std;
using namespace cv;
void main()
{
Mat image = imread("00.jpg"); //Give the full path to the image file
namedWindow("mywin");
imshow("mywin", image);
waitKey(0);
}
Sample code:
//Playing Video
#include "cv.h"
#include "opencv2\core\core.hpp"
#include "opencv2\highgui\highgui.hpp"
#include "opencv2\highgui\highgui.hpp"
#include "highgui.h"
using namespace cv;
int main()
{
// Open the video file
VideoCapture capture("asmall.avi"); //Give the full path for the video file
// check if video successfully opened
if (!capture.isOpened())
return 1;
// Get the frame rate
bool stop(false);
Mat frame; // current video frame
namedWindow("Extracted Frame");
// Delay between each frame in ms
// corresponds to video frame rate
// for all frames in video
while (!stop) {
// read next frame if any
if (!capture.read(frame))
break;
imshow("Extracted Frame",frame);
// introduce a delay in mili-second
waitKey(50);
}
// Close the video file.
// Not required since called by destructor
capture.release();
return 0;
}
Note-
- Detailed tutorial of installing OpenCV in 32 bit OS machine, follow the link.
- Detailed tutorial of installing OpenCV in 64 bit OS machine, follow the link.